Deploying an HAProxy on a Pacemaker Cluster

In this guide, we’ll deploy a HA-HAProxy cluster on a Pacemaker cluster.
Pre-requisites
This guide assumes you have a working Pacemaker cluster with a VIP and a web server deployed on it. See this post for a guide on how to deploy a Pacemaker cluster, this post for deploying nginx as an example web service, and this post for deploying a VIP.
All nodes
Install HAProxy
sudo dnf install -y haproxy
Dependencies resolved.
================================================================================
 Package         Architecture   Version                 Repository         Size
================================================================================
Installing:
 haproxy         x86_64         2.4.22-3.el9_3          appstream         2.2 M

Transaction Summary
================================================================================
Install  1 Package

Total download size: 2.2 M
Installed size: 6.6 M
Downloading Packages:
haproxy-2.4.22-3.el9_3.x86_64.rpm               311 kB/s | 2.2 MB     00:07
--------------------------------------------------------------------------------
Total                                           294 kB/s | 2.2 MB     00:07
Running transaction check
Transaction check succeeded.
Running transaction test
Transaction test succeeded.
Running transaction
  Preparing        :                                                        1/1
  Running scriptlet: haproxy-2.4.22-3.el9_3.x86_64                          1/1
  Installing       : haproxy-2.4.22-3.el9_3.x86_64                          1/1
  Running scriptlet: haproxy-2.4.22-3.el9_3.x86_64                          1/1
  Verifying        : haproxy-2.4.22-3.el9_3.x86_64                          1/1

Installed:
  haproxy-2.4.22-3.el9_3.x86_64

Complete!
Configure nginx to run on port 8080 as a backend
Assuming you are using the nginx example mentioned before, you can simply change the line in /etc/nginx/nginx.conf from
listen 80;
to
listen 8080;
and restart the nginx resource in Pacemaker
sudo pcs resource restart nginx
Now add the ports to the firewall
sudo firewall-cmd --add-port=8080/tcp --permanent
sudo firewall-cmd --reload
As said before, in production these ports should only be open to the cluster’s firewall zone.
Confgure HAProxy as a simple reverse proxy
As a start, configure /etc/haproxy/haproxy.cfg as:
global
    log /dev/log local0
    log /dev/log local1 notice
    chroot /var/lib/haproxy
    stats bind-process 1
    user haproxy
    group haproxy
    daemon

defaults
    log global
    mode http
    option httplog
    option dontlognull
    timeout connect 5000
    timeout client 50000
    timeout server 50000

frontend http_front
    bind 192.168.30.10:80
    default_backend http_back

backend http_back
    balance roundrobin
    server node1 node1:8080 check
    server node2 node2:8080 check
    server node3 node3:8080 check

listen stats
    bind :9000
    stats enable
    stats uri /
    stats refresh 30s
Ensuring that systemd does not manage the HAProxy service
sudo systemctl disable haproxy --now
Create a new resource for HAProxy
For this resource we will create a systemd resource for HAProxy, but we will disable it for now. This is so we can create a colocation constraint with the VIP resource.
sudo pcs resource create haproxy systemd:haproxy op monitor interval=10s --disabled
Cluster name: democluster
Cluster Summary:
  * Stack: corosync (Pacemaker is running)
  * Current DC: node2 (version 2.1.7-5.el9_4-0f7f88312) - partition with quorum
  * Last updated: Sun May 12 06:06:12 2024 on node1
  * Last change:  Sun May 12 06:05:23 2024 by root via root on node1
  * 3 nodes configured
  * 5 resource instances configured (1 DISABLED)

Node List:
  * Online: [ node1 node2 node3 ]

Full List of Resources:
  * Clone Set: nginx-clone [nginx]:
    * Started: [ node1 node2 node3 ]
  * vip (ocf:heartbeat:IPaddr2):         Started node3
  * haproxy     (systemd:haproxy):       Stopped (disabled)

Daemon Status:
  corosync: active/disabled
  pacemaker: active/disabled
  pcsd: active/enabled
Notice that the haproxy resource is disabled and stopped.
Colocate the VIP and HAProxy resources
The following command will create a constraint that will make sure the VIP starts before HAProxy as well as ensuring that they run on the same node.
sudo pcs constraint colocation add haproxy with vip
Once the constraint is added, enable the HAProxy resource
sudo pcs resource enable haproxy
You can verify that the constraint is in place by running
sudo pcs status
Cluster name: democluster
Cluster Summary:
  * Stack: corosync (Pacemaker is running)
  * Current DC: node2 (version 2.1.7-5.el9_4-0f7f88312) - partition with quorum
  * Last updated: Sun May 12 06:10:29 2024 on node1
  * Last change:  Sun May 12 06:08:06 2024 by root via root on node1
  * 3 nodes configured
  * 5 resource instances configured

Node List:
  * Online: [ node1 node2 node3 ]

Full List of Resources:
  * Clone Set: nginx-clone [nginx]:
    * Started: [ node1 node2 node3 ]
  * vip (ocf:heartbeat:IPaddr2):         Started node3
  * haproxy     (systemd:haproxy):       Started node3

Daemon Status:
  corosync: active/disabled
  pacemaker: active/disabled
  pcsd: active/enabled
Configure the private firewall
Allow the nodes in the cluster to reach the backend nginx servers.
sudo firewall-cmd --add-port=8080/tcp --permanent
sudo firewall-cmd --reload
success
success
Configure the public firewall
In case the public http port was open before, we need to open the HAProxy port as well.
sudo firewall-cmd --add-service=http --permanent
sudo firewall-cmd --reload
Configure the admin-only firewall
sudo firewall-cmd --add-port=9000/tcp --permanent
sudo firewall-cmd --reload
success
success
Testing
Checking the Frontend
Navigate to http://192.168.30.10/ (or whatever ip/port combo you chose) to see the nginx test page.
Nginx is Alive

All nginx Servers are Down

HAProxy Status Page
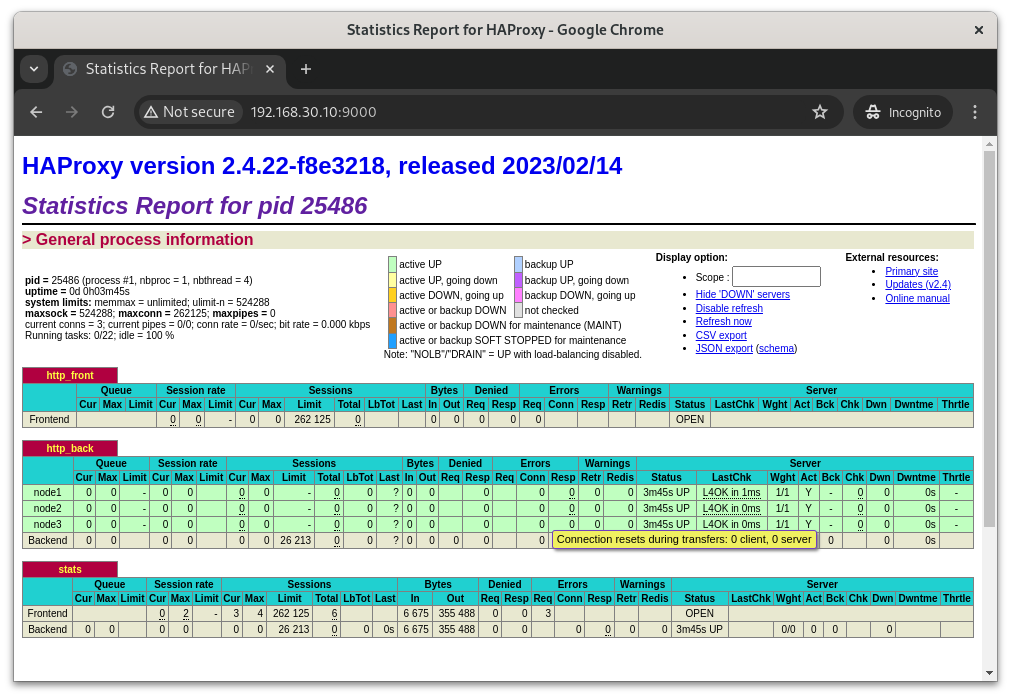
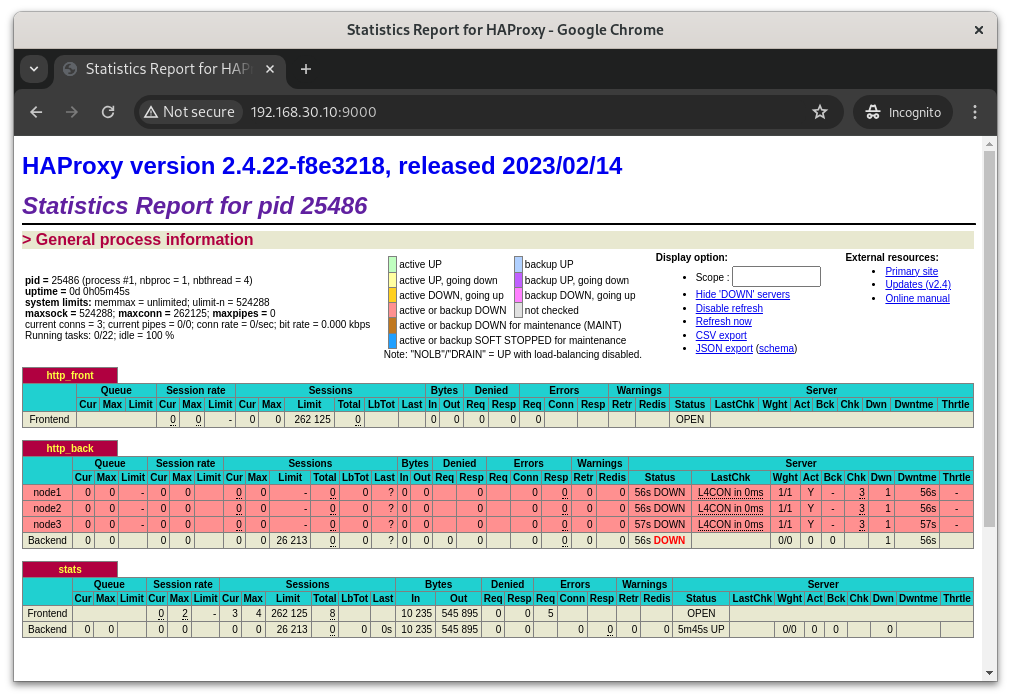
Navigate to http://192.168.30.10:9000/ (or whatever ip/port combo you chose) to see the HAProxy status page.
HAProxy Shows the Backend Servers Happy

HAProxy Shows the Backend Servers Down

Related posts
pacemaker
- Deploying a VIP on a Pacemaker Cluster - 09 May 2024
- Deploying a Simple High-Availability Nginx Service with Pacemaker - 08 May 2024
- Setting up a basic Pacemaker cluster on Rocky Linux 9 - 07 May 2024